
Fall Protection Harness Inspection Checklist
A single frayed thread, distorted D-ring, or deployed impact indicator can compromise a life-critical load-bearing system. A disciplined fall protection harness inspection identifies those defects before personnel and equipment are committed to a high-risk operation.
Need mission-ready fall protection equipment? Contact Fusion Tactical USA for procurement, engineering, and custom manufacturing support.
A formal fall protection harness inspection verifies webbing, stitching, labels, hardware, connectors, and impact indicators before use. Inspectors should quarantine equipment with cuts, heat or chemical damage, distorted hardware, unreadable labels, or evidence of fall loading. Documented reviews support operational readiness, lifecycle planning, and compliance with applicable manufacturer instructions and the organization's safety program.
This technical checklist gives operators, competent persons, program managers, and procurement teams a repeatable method for identifying damage, documenting disposition, and defining retirement criteria before a mission begins.
Need mission-ready fall protection equipment? Contact Fusion Tactical USA for engineering, testing, and procurement support.
Fall protection harness inspection starts before the mission
Safety starts before you leave the ground. A fall protection harness inspection is your first line of defense. In high-risk fields like defense and rescue, a small nick or a loose buckle can lead to a fall. Checking your gear ensures it will work when you need it most. You must find flaws before they put your life at risk.
Work risk control
Treat each harness as a controlled life-safety asset. A pre-mission check is an operational risk control that identifies damage from prior use, transport, or storage before the system enters service. When an operator finds a defect, the unit should be tagged, quarantined, and replaced under the organization's approved procedure.
Checking gear should be a habit for every expert. You should check the webbing for cuts or fraying. Look for signs of heat damage like burnt fibers or shiny spots. Hardware should be free of rust or bends. Taking these steps helps you properly inspect your fall arrest harness before every use. Never skip this step when your safety is on the line.
Telling checks apart
Not all checks are the same. A pre-mission check is a quick visual test done by the user. You look for big issues that make the gear unsafe right now. This is not like a full inspection. Formal tests must happen at least every three to six months. A trained person must log these results in a file.
During your check, you should grasp the webbing and bend it into a U-shape. This makes small cuts or tears easier to see. You must also check that the product tags are still there and easy to read. According to OSHA inspection rules, you must remove the harness from service if the tag is missing or hard to read. Labels tell you the age and limits of your gear.
ANSI and OSHA rules
U.S. rules require these checks to keep people safe at work. OSHA standards like 29 CFR 1910 and 1926 set the base for safety. They state that firms must give gear that is in good shape. They also require a way to promptly rescue a worker if a fall happens. Fast rescue is key to saving lives after a fall.
ANSI Z359 is another key set of rules. It gives more details on how to test and keep fall gear. Meeting these rules shows that your gear is ready for hard use. Fusion Tactical systems meet these high bars to ensure success. By following these rules, you keep your gear in top shape and ready for any task.
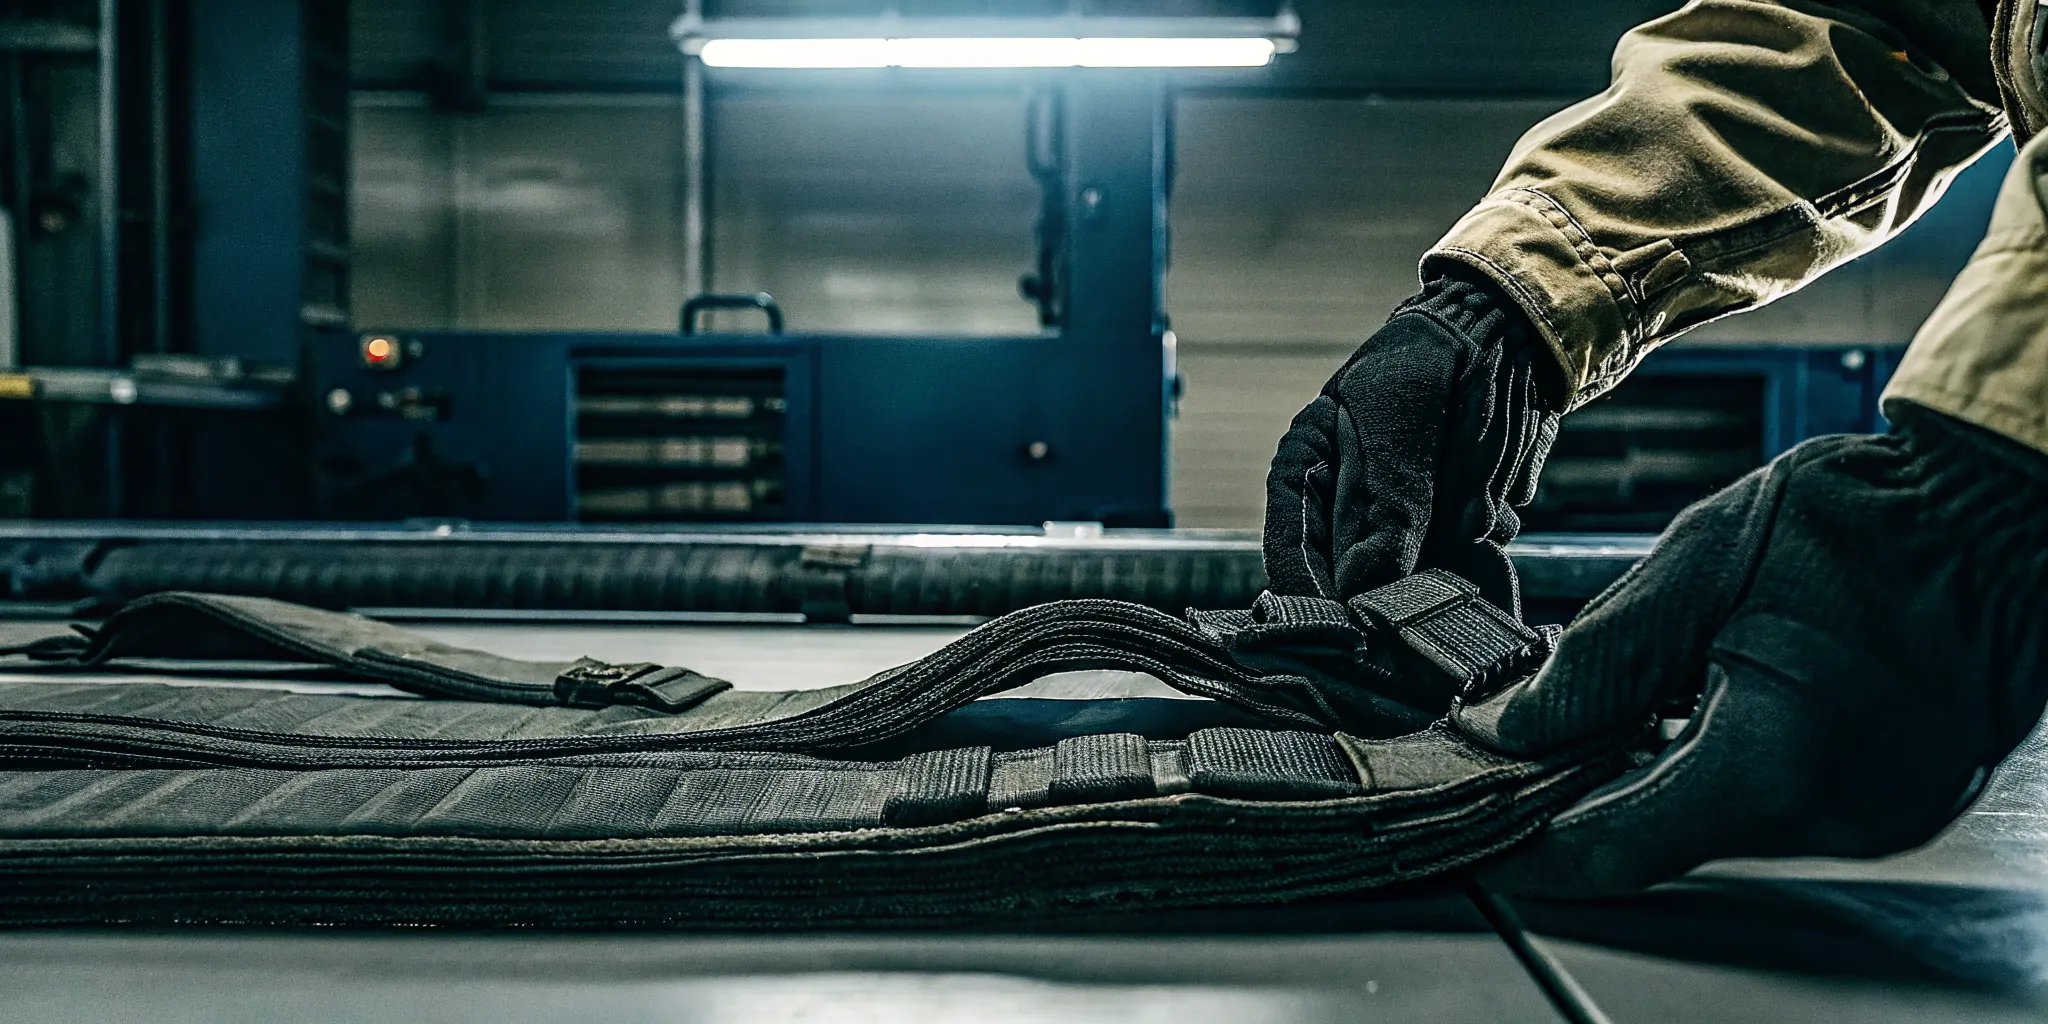
How do you inspect webbing and stitching for hidden damage?
Inspect webbing under bright light, working the full length through gloved hands to expose cuts, glazing, chemical damage, pulled fibers, and distorted load-bearing stitches. Compare questionable areas with an approved reference unit. Quarantine the harness whenever damage, contamination, or stitch displacement creates uncertainty about continued service.
Inspect webbing one section at a time by bending it into an inverted U-shape under good lighting. Examine both faces, edges, load-bearing stitch patterns, and attachment points for cuts, pulled threads, abrasion, glazing, discoloration, stiffness, or chemical exposure. Quarantine the assembly when damage or contamination makes its serviceability uncertain.
To properly inspect your fall arrest harness, you must look at every inch of the fabric. Small nicks or worn edges can lead to sudden failure during a fall. You should start by holding the webbing with both hands. Bend a six to eight inch section into an inverted U-shape. This creates surface tension that makes small cuts, broken fibers, or chemical damage easier to see. Repeat this process along the full length of each strap to find hidden wear.
Check for heat and chemical damage
Heat and chemicals can weaken synthetic fibers without changing the look of the harness much. You must search for hard or shiny spots on the webbing or stitching. These spots often show that the harness has been near high heat or fire. You should also look for charred or melted fibers. If you find these signs, you must remove the harness from service right away. Exposure to harsh fumes or acids can also cause the fabric to become brittle or change color. Proper storage in a dry area away from direct light helps prevent this type of slow decay.
Examine stitch patterns and thread integrity
The stitching is what holds the harness together under a heavy load. You need to check the load-bearing stitch patterns for pulled, cut, or missing threads. Inspect the areas where the webbing meets the hardware or other straps. These spots take the most stress during a fall. Any sign of uneven webbing thickness could mean the harness has already seen a fall or extreme load. If the stitch patterns are not intact, the tool is no longer safe to use. You can find more details on OSHA-compliant fall protection inspection criteria through our online safety guides.
Identify edge wear and surface nicks
The edges of the webbing are prone to fraying from daily use. You should look for fuzzy fibers or jagged edges that show the material is breaking down. Even a small nick on the edge can grow into a deep tear when put under tension. You must also check for dirt or grease that is ground into the fibers. These grit bits can act like small knives that cut the inner threads over time. If the damage is more than just surface fuzz, the harness has reached its end of life. Never try to fix the webbing or stitching in the field. Only the maker should perform repairs to ensure the system still meets safety standards.
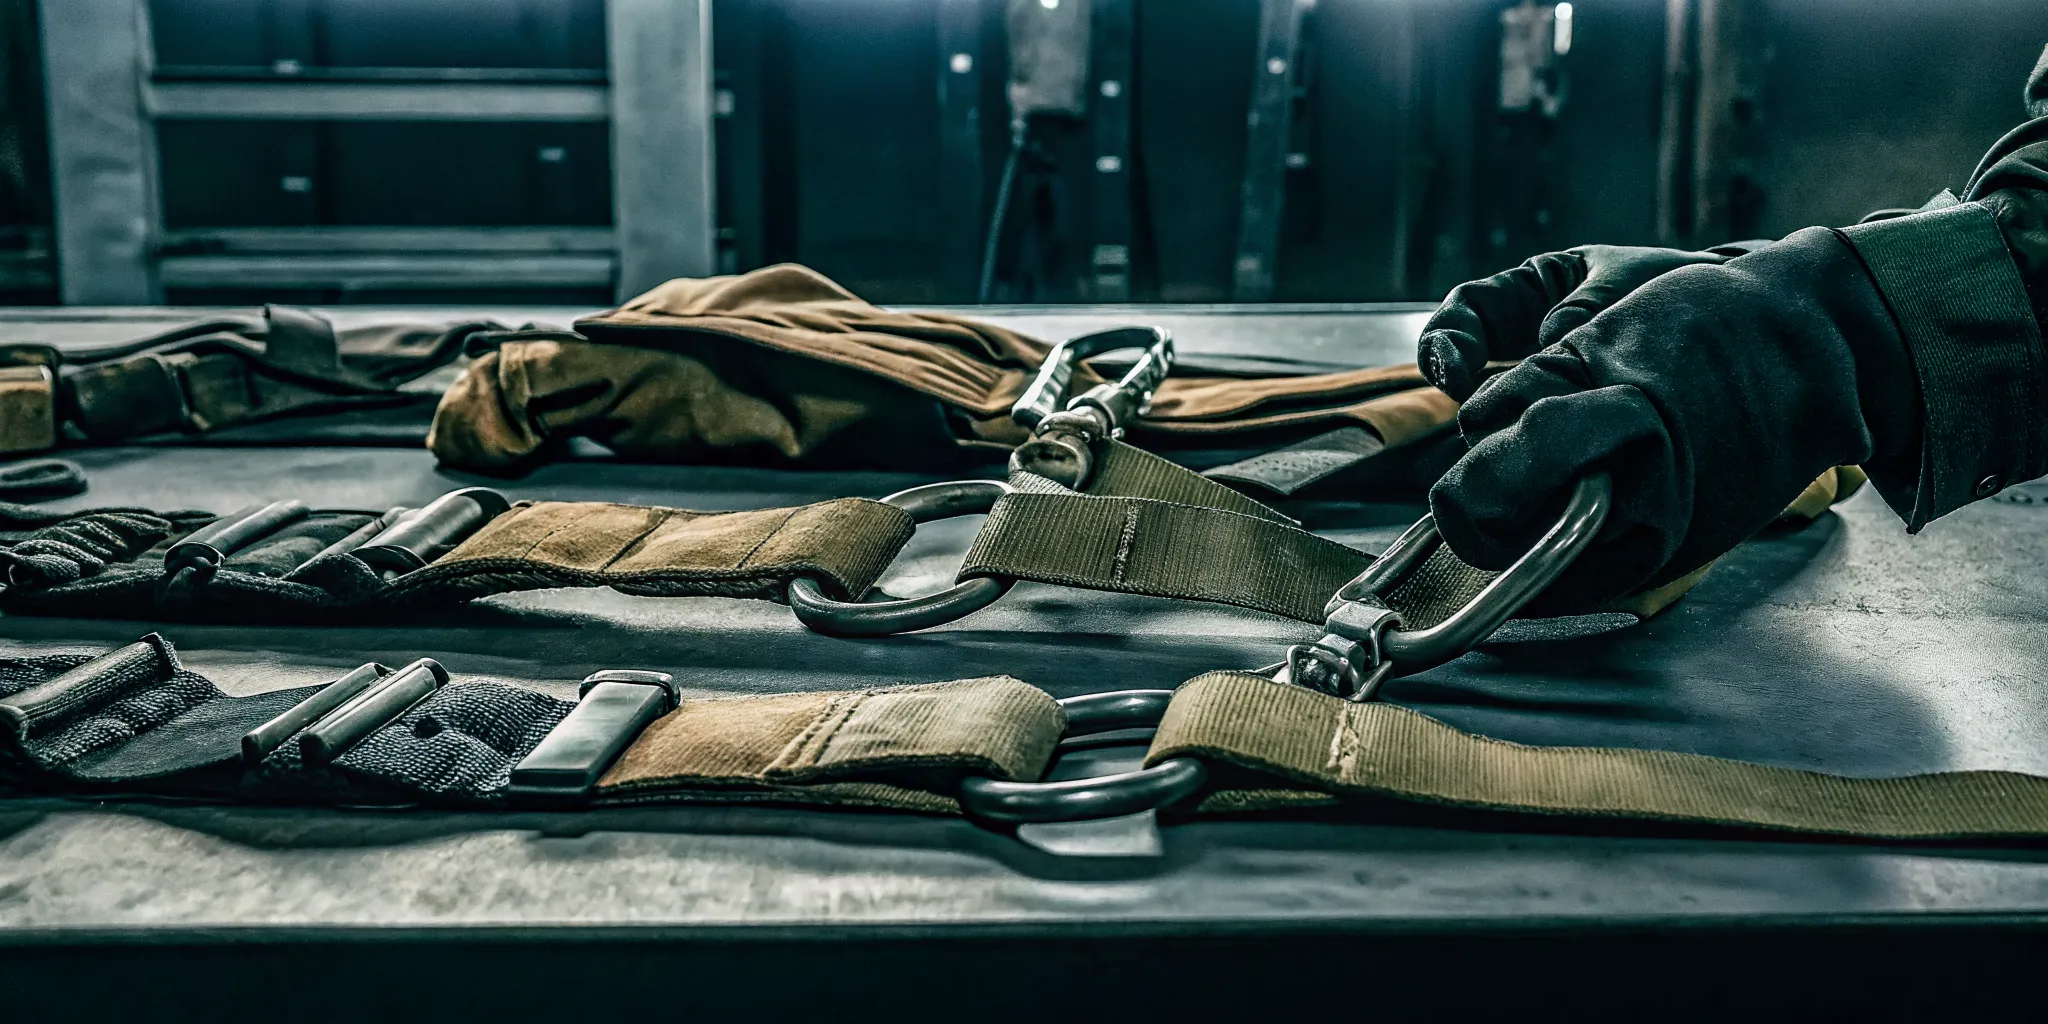
Harness hardware and lanyard inspection criteria
A full fall protection harness inspection must include a close look at all metal parts. This process ensures that buckles, D-rings, and adjusters can hold weight during a fall. You should check each piece for bends or sharp edges that could cut the webbing. Even small signs of rust can weaken the metal over time. If you find any cracks or pits in the steel or aluminum, the harness should not be used in the field. Every metal part must be clean and free of dirt to work as intended. Regular care helps to extend the life of your safety gear.
Hardware visual and functional checks
You must check that all moving parts on the harness work without sticking. Tongue buckles should overlap the buckle frame and move freely in their socket. If a buckle sticks or the spring does not snap shut, the gear is unsafe. You should also look for twists or bends in the D-rings. Any part that has been pulled out of shape may not hold its rated load. These inspecting your rescue harness and connectors steps are vital for mission safety. Hardware made from steel or aluminum must be smooth to the touch.
Check the gates on snap hooks and carabiners to see if they lock and unlock with ease. The gate must close and lock on its own once you let it go. You should also look at the rivet points and springs for signs of wear or damage. If a connector does not lock, it creates a risk of rolling out during a fall. These checks help you find issues before they lead to a failure in a high-risk environment. Rough spots or sharp edges on a hook can snag and damage the webbing fibers. This damage can reduce the strength of the whole system over time.
Comparison of hardware status
Use this table to compare hardware conditions.
| Component. | Pass Criteria. | Fail Criteria. |
|---|---|---|
| Buckles. | Move freely and lock tight. | Bends, cracks, or rust. |
| D-Rings. | Flat and true shape. | Twists or deep pits. |
| Snap Hooks. | Gate locks on its own. | Sticking or weak springs. |
| Adjusters. | Hold webbing without slip. | Sharp edges or burrs. |
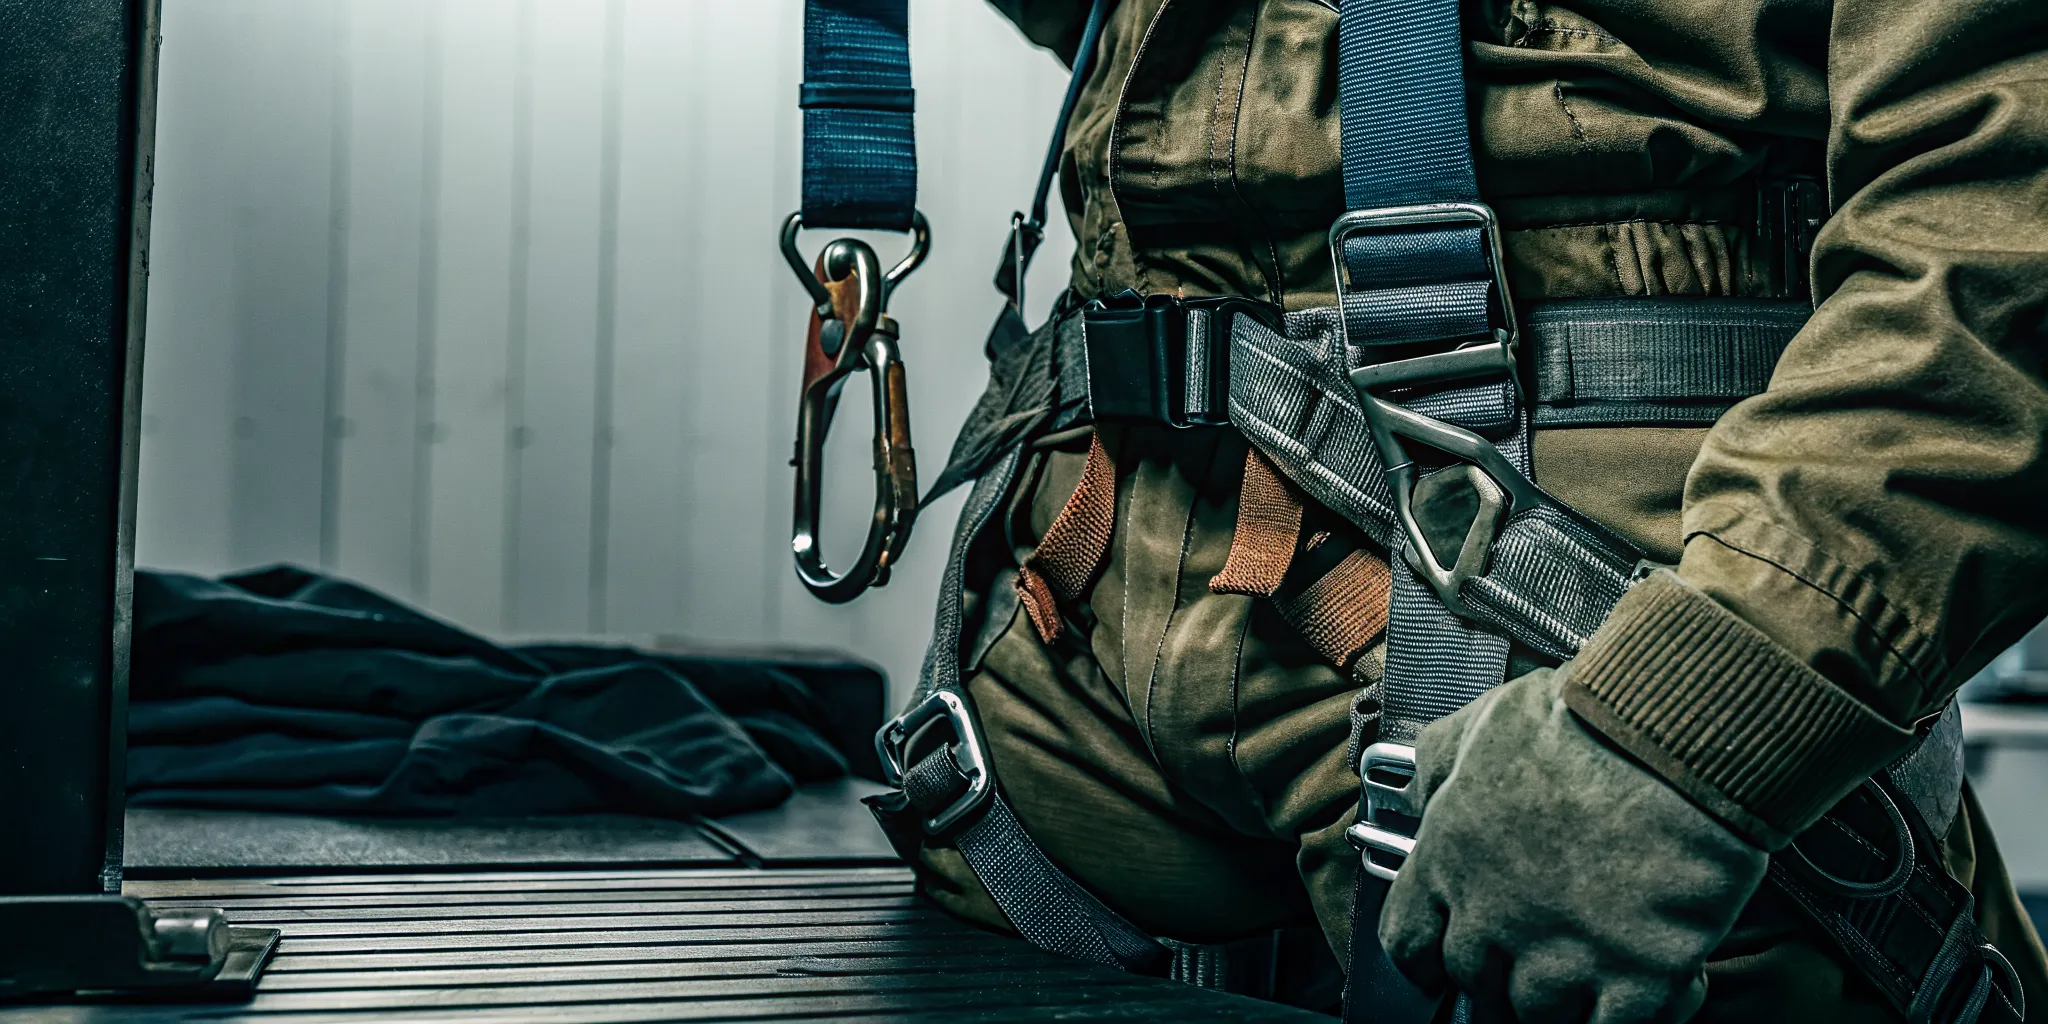
Lanyard and connector risks
When you attach a lanyard, you must ensure it fits the harness D-ring. Parts that do not fit well together can cause the gate to open by accident. This is known as an incompatibility risk. You should only use connectors that are the right size for the anchor point or D-ring. Using the wrong size can put too much stress on the gate. Always check that your lanyard hooks are rated for the loads they will face. This keeps your safety system strong and ready for use. Small lanyards should never be forced onto large D-rings as this can damage the hardware.
Inspect the lanyard body for cuts or fraying along its length. Look for any signs of heat damage like melted fibers or hard spots. You should also check the shock pack if the lanyard has one. If the pack is torn or showing its warning tag, you must remove the lanyard from service. A used shock pack cannot protect you in a second fall. If you see hard or shiny spots on the webbing, you must stop using the lanyard. These spots show that the fibers have melted and can no longer hold a load.
Any lanyard that has been in a fall must be cut and thrown away right away. You should never try to fix a damaged lanyard or reuse parts from it. Staying safe means knowing when to retire your gear. Keeping a clear record of these checks helps you stay in line with safety rules. Each check should be noted in your log to track the health of your gear. This data is helpful if you need to show proof of a proper safety program.
What defects require immediate removal from service?
Remove a harness from service immediately when inspection finds cut or heat-damaged webbing, broken load-bearing stitches. Deformed or corroded hardware, an activated impact indicator, illegible identification, or contamination that cannot be evaluated. Tag and quarantine the asset so it cannot return to operational inventory before disposition.
Remove a harness, lanyard, or connector from service immediately after a fall event or when inspection reveals cuts. Torn stitching, heat or chemical damage, distorted or cracked hardware, failed locking action, deployed impact indicators, or unreadable identification labels. Clearly tag and quarantine the item pending disposition by an authorized competent person.
A life-critical system must work every time. If a fall protection harness inspection shows a big flaw, you must pull that unit from use. Any gear that has stopped a fall must go into a safe area right away. A trained person must then decide if the unit is safe or needs to be cut up. You should never guess when it comes to mission safety. This keeps your team safe in high-risk zones where gear failure is not an option.
Webbing and fiber damage
Damage to the webbing often means the unit can no longer hold a heavy load. Look for these flaws during every check.
- Cuts, tears, or frayed edges.
- Nicks found by bending the strap into a U-shape.
- Hard, shiny, or charred spots from heat.
- Brittle or stiff areas from sun or chemicals.
OSHA rules say that shiny spots show the fibers have melted. If you find any of these flaws, the gear is no longer safe to use. You should also check for uneven webbing thickness, which signals a past fall.
Hardware failure and rust
The metal parts of your harness must stay in their first shape. Check all D-rings, buckles, and parts for twists or bends. Sharp edges can cut through webbing under a heavy load. You must also watch for rust or deep pits that weaken the metal. Test every buckle to ensure it locks and opens with ease. Tongue buckles must move freely and overlap the frame to work right. If any metal part fails to snap shut, the whole harness must go. You must also properly inspect your fall arrest harness for cracks in the plastic parts.
Labels, records, and fall impact
Every piece of safety gear needs a clear ID tag. This tag must show the model, the date it was made, and warnings. If the label is missing or you cannot read it, you must stop using the harness. This ensures your team follows OSHA-compliant fall protection inspection criteria at all times. Without a tag, you cannot track the age or past of the unit. You should also pull gear from use if you do not know where it has been. Gear with no records can hide old damage that puts lives at risk.
Most modern harnesses also have fall impact indicators. These tags or stitches deploy when the unit takes a heavy load. If you see these signs, you must retire the harness at once. Chemical stains from paint, grease, or ink are also a risk. Even a permanent marker can damage some fibers. If you find strange stains or stiff spots, take the unit to a pro for a look. They will decide if the gear is still safe for the field.
How should inspection records support procurement and readiness?
Inspection records should connect each serialized asset to its inspection date, inspector, observed condition, corrective action, and final disposition. Program managers can use this evidence to identify recurring defects, forecast replacements, verify approved configurations, and strengthen lifecycle requirements in future procurement specifications.
Inspection records should connect each serialized asset to its model, manufacturer, service date, inspection history, defects, quarantine status, and final disposition. Program managers can use this history to identify wear patterns, forecast replacement demand, support audits, and write procurement specifications that account for operational conditions and lifecycle risk.
Good records keep teams ready for any mission. Clear logs allow program leaders to track each asset from the start. A solid government defense contracting plan needs deep tracking to meet strict rules. Every unit must show its birth date and its full check logs to stay in the field.
These records do more than just meet rules. They give leaders a clear view of how gear wears down over time. This data helps teams buy new gear at the right time. It keeps the supply chain moving so that no user is left without safe tools. Good logs are the backbone of a safe and ready unit.
Asset tracking and record keeping
Every piece of gear needs a clear tag. This label must show the model, the maker, and the date it was built. If a tag is lost or can not be read, you must pull that unit from use. This is a key part of U.S. safety rules for life-critical tools. Proper tags make sure every piece of hardware is used only during its safe life.
Teams must keep logs for daily visual checks and deep reviews. These checks catch big problems before a mission starts. Deep reviews find small issues that might be missed in a quick look. Detailed logs help during audits. They also help track who last checked the gear and when.
Competent person review and quarantine
A trained expert must lead the deep fall protection harness inspection every ninety days. They look for small cuts, burns, or rust. If they find a flaw, the gear goes into a locked quarantine spot. This stops accidents. It keeps bad gear out of the field while waiting for a final call.
Quarantine logs must show why the gear was taken out of service. These notes help the team decide to either fix the unit or throw it away. Keeping these logs neat helps the team follow ISO rules for tracking parts. This level of care is a must for any unit that works in high-risk spots where failure is not a choice.
Storage and maintenance controls
Proper storage keeps your tools in top shape. Gear should stay in clean, dry rooms away from high heat and bright sun. Harsh fumes and strong soaps can weaken the webbing or rust the metal over time. Good storage logs prove that the gear was kept in a safe spot between its uses.
Care records should also track every time a unit is cleaned. Use only mild soap. Let the gear air dry in the shade. Strong cleaners can strip coatings or hurt the fibers of the harness. Keeping the gear clean makes it much easier to find small nicks or tears. Good care and clear notes help your safety systems last longer.
Build inspection criteria into the equipment specification
Buying teams and program leads should include inspection needs in the first gear plan. Buying high-quality tools is only the first step. You must also plan for the full life of the rig. This starts by picking units that meet clear safety rules. When you set the specs, you ensure the gear stays safe for years of use. A well-built rig makes the fall protection harness inspection much easier for your team.
Compliance with safety standards
Your gear specs must align with current safety laws. Fusion Tactical builds units to match OSHA-ready fall protection inspection rules. These rules ensure that every belt can handle the stress of a real fall. For example, federal law says that systems must allow for the fast rescue of a fallen worker. You should check that your plan includes these needs. This helps you avoid fines and keeps your people safe in the field.
Every rig needs a clear tag to stay in use. This tag must show the model, date of make, and the maker's name. If a tag is lost or hard to read, the law says you must stop using the rig. Rules from an OSHA inspection guide help teams find these small but vital details. By building these rules into your buy list, you ensure that every unit is easy to track and check. This is vital for long-term safety and record keeping.
Custom builds for mission-critical use
Basic gear may not fit every task. Custom builds allow you to add parts that meet your exact needs. Fusion Tactical uses Type 13 webbing, which is rated to 5,000 lbs. We also use top-grade steel and aluminum for all hardware. These strong parts help the gear last longer in harsh spaces. When you ask for custom work, you can also ask for proof of testing. This helps you trust the gear before it ever goes to the field.
Makers should think about how the gear will wear over time. High heat or UV light can harm some fibers. If you see hard or shiny spots on the belt, it likely has heat harm. These units must be removed from use right away. By picking the right parts at the start, you can lower the risk of early wear. This ensures that your rig stays strong even in tough spots.
Lifecycle planning and retirement rules
Clear rules for when to toss gear are a must. You should check the webbing by bending a small section into a U-shape. This helps you find nicks, cuts, or tears in the fibers. If the belt thickness is not even, it might have taken a heavy load or a fall. In these cases, you must pull it from the field. Having these rules in your SOPs makes it easy to know when to buy new rigs.
- Check webbing for burns, charring, or melted parts.
- Look at metal parts for bends, rust, or sharp edges.
- Ensure tongue buckles move freely in their sockets.
You should do a visual check before every task. You also need a deep review once every three months. Fusion Tactical provides engineering and testing services to help you set these rules. These steps ensure your gear stays in top shape. Proper care and clear plans help you get the most value from your rig while keeping your team safe.
Building a documented inspection and replacement program? Contact Fusion Tactical USA for government procurement and mission-specific equipment support.
Frequently Asked Questions
How often should I inspect my fall protection harness?
You should do a visual check before every mission. This helps you find new damage from storage or recent use. According to the Fusion Tactical testing guide, safety gear needs a formal check every three months. A trained person must do this and keep a written log. If the gear stops a fall, you must stop using it at once. Frequent checks ensure the harness stays in top shape for high-risk work.
Does OSHA require harness inspection records?
Yes. Federal rules say you need to keep records of your safety checks. You must show that a trained person has looked at the gear in the last six months. According to OSHA guides, these records must include the date and the name of the person who did the check. These logs prove your site is safe and follows the law. Keeping good files helps you track the age and health of every unit in your fleet.
What do fall arrest impact markers tell you?
Impact markers show if a harness has taken a heavy load during a fall. These tags or special stitches pull out to warn you that the gear is no longer safe. You must check these markers during every pre-mission check. If you see a marker that has pulled out, you must pull the unit from use at once. Using gear that has already stopped a fall is very risky. These markers help you spot hidden damage that you cannot see in the straps.
What is the best way to store a tactical harness?
Proper storage helps your gear last longer and stay safe. You should keep your harnesses and lanyards in a clean, dry area. Avoid spots with high heat or direct sun, as UV rays can weaken the fibers. According to OSHA safety guides, you must also keep gear away from fumes and chemicals. Never store your harness on a floor where it can get damp or dirty. Good care prevents rust on the metal hardware and keeps the webbing strong.
Ready to start a gear review program?
Using worn gear with small tears or cracks puts your team at high risk of failure when you need it most. If you wait for a part to break before acting, it might be too late to fix the problem safely. You should start a solid review plan today with our testing services to keep your crew safe and get new parts before your current ones fail. Do not let old gear be the weak link in your next mission when taking action now keeps your costs low over time. This is the best way to ensure mission success and safety for everyone in the field today.
Ready to call our experts? Call (909) 393-9450 to contact Fusion Tactical USA for procurement, custom manufacturing, or mission-specific equipment support.

