

Confined Space Rescue Tripod Setup Guide
At a confined-space opening, a tripod is not ready for use simply because its legs are open and a retrieval device is attached. The setup has to fit the task, keep the retrieval path workable, and support the planned removal of an entrant without introducing avoidable risk.
A confined space rescue tripod setup is a site- and task-specific arrangement of the tripod, retrieval device, line, connections, and opening geometry, checked as one intended load path. It is an operational configuration, not a choice of equipment from a general system comparison. Its suitability depends on how the components align with the opening and the planned retrieval.
That distinction matters before entry, when the team can still identify constraints and correct the arrangement. Start by defining what the system must accomplish at the opening, then assess the space, retrieval route, and roles that shape a usable setup.
Request a quote or engineering consultation for mission-specific rescue hardware.
What must a confined space rescue tripod setup solve at the opening?
A confined space rescue tripod setup must provide a clear route to move an entrant through the opening and transfer retrieval to people and equipment outside. Fit the opening, entrant, line, device, and work area together. Treat them as a task-specific geometry, not as a tripod that acts as a full rescue system.
Start with the actual rescue movement, not the equipment catalog. Identify where the entrant will be during work and the path for retrieval. Confirm where the attendant can operate the system without entering the hazard area. Consider whether the entrant can pass through the opening without striking its rim, becoming caught on internal features, or being pulled into a position that prevents removal. The answer depends on the space and work, so a setup suitable for one access point should not be assumed to work at another.
Then trace the retrieval route from the entrant interface up to the lifting device or outside anchor. Ask whether the line can move along the intended path without snagging, rubbing against a damaging edge, or being diverted away from the lifting point. The tripod head, line route, and opening should support the planned direction of movement. A line that appears aligned while the entrant is outside may behave differently once it contacts the edge or the entrant approaches the opening. Account for that transition before entry, and do not use a tripod position that forces an unplanned side pull or obstructs the opening.
A tripod is one positioned component in that arrangement. Its presence does not, by itself, establish that the lifting device, line, connections, footing, or complete load path are appropriate for the planned retrieval. Determine how the device will be attached and operated, where its legs will bear, and whether attendants can reach controls while preserving clear access. Keep the setup decision tied to the specific opening and retrieval task; system selection and component ratings require separate evaluation.
For general industry, OSHA's permit-space standard addresses non-entry retrieval when an authorized entrant enters a covered space, unless retrieval would increase risk or would not aid rescue. See 29 CFR 1910.146. It describes a retrieval system as including a retrieval line, harness or other specified interface, and a lifting device or anchor. The line's other end must connect outside the space to a mechanical device or fixed point, so rescue can begin when needed. A mechanical device must be available for vertical permit spaces more than five feet deep. This section applies to general industry, not agriculture, construction, or shipyard employment. Confirm which requirements apply to the operation and sector instead of treating this discussion as a compliance determination.
Before entry, ask whether the assigned team can begin retrieval promptly and move the entrant through this opening without a new obstruction or hazard. If the path is uncertain, revise and reassess before work begins.
How can the tripod sit over a stable, centered work envelope?
Center the tripod head over the access opening and place its legs on stable support. Check the ground, clearance, and equipment instructions before entry. If footing or geometry cannot be verified, stop and reassess rather than improvising.
The tripod location determines whether the retrieval line can travel through the opening without pulling the device or support out of alignment. Start by identifying the opening, the entrant's expected position, and the route needed to raise or lower the person. Position the head above the opening along that planned line of travel. Keep the support legs outside the opening and clear of the attendant's work area, access routes, and other equipment. The objective is an unobstructed work envelope in which the retrieval device can operate as intended, not simply a tripod that fits beside the opening.
Consider the entire movement, not only the starting position. The entrant or rescue team may move through the opening while the line is under control. The attendant must monitor retrieval without stepping into a leg's footprint or crossing the line. Confirm that doors, covers, barriers, and nearby operations will not crowd the support or block the intended route. The setup should leave room for controlled handling while keeping the tripod feet and retrieval equipment undisturbed.
Inspect the surface under each foot before loading the system. Look for loose material, voids, slopes, contamination, or other conditions that could allow a foot to shift. Set and secure the legs using the manufacturer's instructions, and verify that each lock or adjustment is engaged as designed. Do not compensate for uneven ground with loose packing, unapproved extensions, or a position that leaves a leg poorly supported. If a stable footprint cannot be established within the equipment's permitted configuration, pause work and have a competent person reassess the location or planned method.
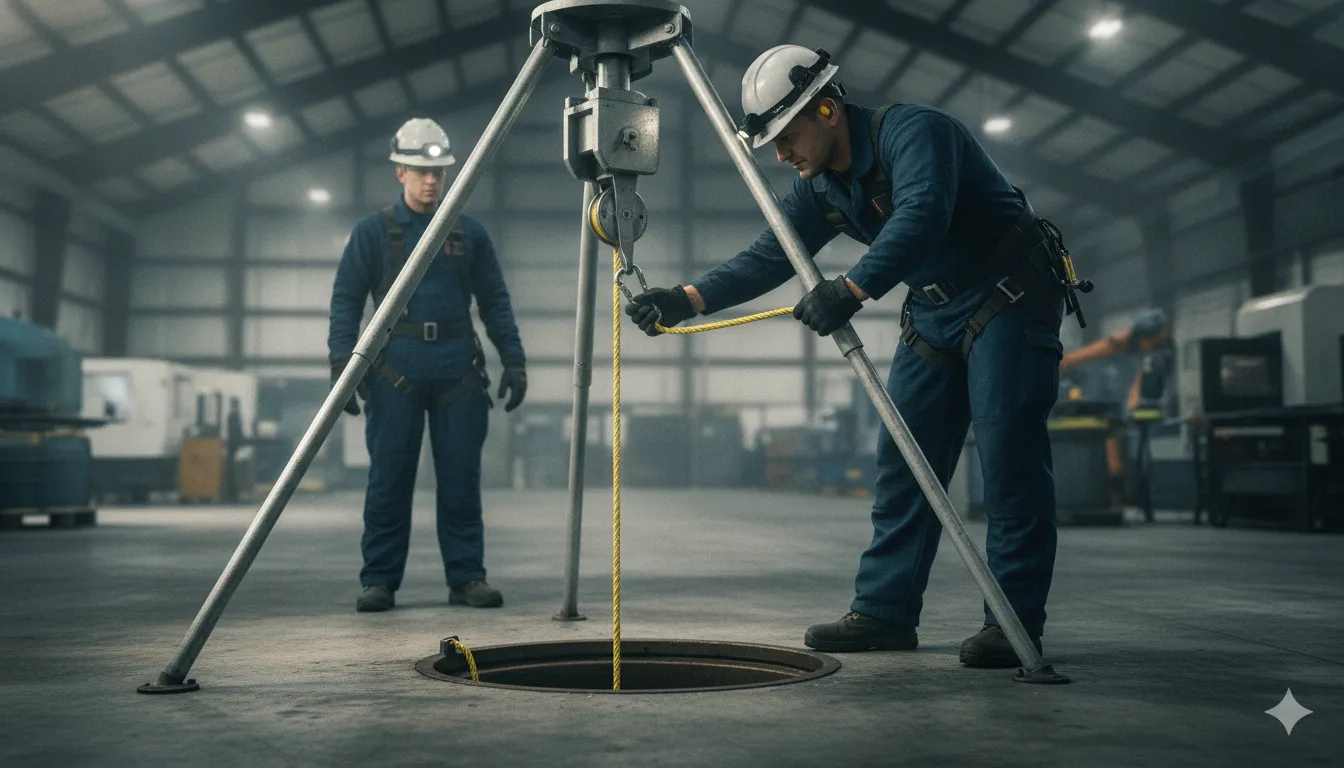
Check clearance above and around the head, legs, and opening. Confirm that nearby piping, platforms, vehicles, or stored materials will not obstruct movement or interfere with the tripod during retrieval. Keep the load path aligned with the equipment's intended direction of use. A side pull, leg contact with surrounding structures, or a line that catches on the edge can change how forces act on the support. Do not treat a convenient position as acceptable if it creates side-loading or relies on an unstable surface.
Before entry, review the final position against the applicable equipment manual and site rescue plan. OSHA's interpretation explains that applicable requirements depend on the use of a tripod or winch. Suspension for work differs from raising or lowering a person for retrieval; the letter does not establish placement specifications (OSHA interpretation). Use the planned function and applicable rules to guide the review, not the interpretation as a setup recipe. If the opening cannot be centered under the head, the footing changes, or clearance conflicts with the plan, stop, secure the area, and reassess before proceeding.
How should the retrieval line and winch be routed?
Route each retrieval line to an external mechanical device or fixed point along a clear path for prompt removal. Keep it aligned with the opening and lifting path. Avoid sharp edges, pinch points, moving equipment, or surfaces that could damage, snag, or deflect the line.
Before entry, trace the complete route from the entrant interface up through the opening to the winch or anchor. Confirm that the line will not wrap around tripod legs, cross another line in a way that creates interference, or catch on the rim as the entrant moves. The line should remain accessible to the attendant and should not obstruct the entrant's work or egress. If the opening geometry makes a straight path impossible, treat any change in direction as a system-design decision, not an improvised adjustment at the edge.
Use only winches, connectors, redirect devices, and pulley configurations that their manufacturers approve for the intended application and that are included in the site's reviewed rescue plan. Check that each connector is compatible with its attachment points and that the line remains properly seated through the full range of planned movement. A pulley can change line direction or support a planned mechanical arrangement. It does not establish that the tripod, winch, line, anchors, or complete system are suitable. Do not assume that a Fusion Tactical pulley is approved for tripod use. The Fusion Tactical Rescue Double Pulley is listed with a 34 kN rating, but a component rating is not the capacity of the assembled rescue system. See the guide to rescue pulley ratings and hardware specifications for why components must be evaluated within their full load path.
OSHA's permit-space rule addresses retrieval equipment, including a retrieval line and lifting device or anchor. For covered general-industry permit spaces, retrieval systems are used unless they increase overall risk or do not aid rescue. The rule also addresses connecting the line's other end to an external mechanical device or fixed point. Apply the rule to the specific operation and work sector, since 29 CFR 1910.146 does not cover every industry. OSHA's 2013 interpretation says the cited retrieval-line requirements apply to authorized entrants, not rescuers who enter to perform rescue. An arrangement with sequential attachment must still allow individual removal without impeding it. Interpretation letters explain OSHA's application of requirements to described circumstances; they do not create additional obligations or certify a particular setup. Consult the governing program, equipment instructions, and qualified safety personnel for the job-specific configuration. See 29 CFR 1910.146 and OSHA's 2013 interpretation.
Finally, operate the line through its planned travel before entry, where the procedure allows, while observing the opening and all redirects. Resolve rubbing, slack accumulation, entanglement, or rim contact before authorizing entry. If the route cannot stay controlled through retrieval, revise and reassess it. Do not rely on the attendant to correct a snag during an emergency.
Verify the complete load path before entry
A rescue load path depends on each connection, support, and interface. Trace it from the entrant attachment to the line, device, connectors, tripod head, legs, feet, and ground. Check that each element fits the planned operation.
A component rating is not proof of total system capacity. The configuration, maker limits, connection geometry, and site conditions matter. A qualified person must assess the worksite before use.
Start at the entrant interface. Confirm that the harness connection point matches the planned retrieval method. Check that the line attachment supports removal without interfering with the entrant or other equipment. Check how the line is secured and whether the attachment arrangement matches the rescue plan. OSHA's permit-required confined-space rule describes retrieval-system elements and entrant line arrangements for covered general-industry operations; applicability depends on the work and sector. Review 29 CFR 1910.146 rather than assuming one arrangement fits every site.
Follow the line to the retrieval device. Verify that the line is compatible with the device, correctly seated and routed, and free of twists, snags, or contact that could damage it. Check every connector for the intended connection, secure closure, and alignment under the expected direction of pull. A connector loaded across an unintended axis or forced against another component can change how the assembly behaves. If the plan uses a pulley, confirm that the system design and device instructions permit it. A component rating alone does not establish a safe working capacity for the full arrangement. Fusion Tactical's rescue anchor system engineering guide and rescue pulley specification guide provide related component-selection context.
Continue from the device and its connector to the tripod head. Confirm the device is attached at an approved point, with the line following the intended path and the pull aligned with the head and opening. Then inspect the legs, locks, feet, and ground as one support assembly. Look for movement, settlement, uneven contact, or conditions that could shift under load. Do not compensate for a poor fit by improvising a connection or changing the tripod geometry outside its instructions.
Finally, compare the full setup with the manufacturers' instructions, labels, and limits for each item, plus the site rescue plan and required documentation. Record the actual components and configuration, not just a model name or the highest number printed on one part. If the planned path, ground, or connection differs from the documented use, stop and have a qualified person assess it before entry. This is general setup guidance, not approval of a particular site or system.
| Load-path segment | Setup verification focus |
|---|---|
| Entrant interface to line | Confirm the planned attachment point and compatible line arrangement. |
| Line to device and connectors | Check compatibility, secure connections, line seating, and intended direction of pull. |
| Device to tripod head | Use only the manufacturer-approved mounting point and configuration. |
| Tripod legs to ground | Check locks, foot contact, surface stability, clearance, and signs of movement. |
Inspect, function-check, and brief the team
Before entry, inspect the assembled retrieval setup and function-check it against manufacturers' instructions and the site's rescue plan. A briefing confirms who operates the device, attends the opening, directs rescue, and communicates if conditions change.
Use the pre-use check to catch visible defects and setup errors, not to declare the system safe by inspection alone. Confirm that every component is suitable for its intended use, correctly assembled, and consistent with the planned load path and rescue method.
- Tripod structure and feet: Look for damage, deformation, or loose or missing parts. Confirm the legs are positioned as planned and the feet are seated on the prepared surface.
- Locks and connections: Verify leg locks are engaged as directed. Check pins, attachment points, and connectors for proper engagement and damage, using the manufacturer's prescribed checks.
- Device and line: Check the retrieval device's attachment and operation using its instructions. Inspect the line for cuts, abrasion, contamination, kinks, or other damage addressed by the manufacturer. Confirm it pays out and retrieves as intended, without snagging or contacting an uncontrolled sharp edge.
- Opening and work zone: Reconfirm the head position and line path relative to the opening, and keep the planned operating area clear. Identify obstructions or changing site conditions that could interfere with retrieval.
Conduct a controlled operational check before entry, following the manufacturers' procedures and rescue plan. Confirm that the operator can control the device, the line follows its route, and the attendant can monitor the entrant as planned. Agree on primary and backup communications, action signals, and the response to communication failure. Do not improvise an unauthorized test load or method.
Assign roles by name, not just job title. The operator manages the retrieval device and follows signals. The attendant monitors the opening and maintains communication. The rescue lead coordinates the response and confirms resources are available. Brief stop-work conditions, escalation, and how to prevent unplanned entry during a response. Each person should understand their limits and role handoff.
For general-industry permit-required confined spaces, OSHA's 29 CFR 1910.146 includes retrieval-system provisions. These include a mechanical device for vertical permit spaces more than five feet deep, subject to stated exceptions. Applicability depends on the sector and circumstances. Check governing requirements and the site program rather than treating this as a compliance determination. Record checks and corrective actions. Do not proceed until deficiencies are addressed. An inspection and briefing support readiness, but do not guarantee a safe rescue.
What should the setup record capture?
A useful setup record lets the next person understand what was installed, where it was positioned, how it was checked, and who approved it for the planned entry. Treat it as operational evidence that supports the site's permit and rescue procedures, not as a universal OSHA form or a substitute for manufacturer instructions.
Keep the record specific to the opening and the task. A concise diagram, component identifiers, check results, assigned roles, and documented changes can make the setup easier to verify during a shift handoff, an audit, or procurement review.
Show the opening and equipment configuration
Start with the work location, date, and space or opening identifier. Add a simple site diagram or clear photographs showing the opening, tripod feet, head position, retrieval-device location, line route, edge protection, nearby obstructions, and planned entrant path. Mark only dimensions or clearances that explain the configuration. Note ground or floor conditions that affected placement. This lets a reviewer compare the record with the actual setup without implying that a sketch alone proves suitability.
Identify the tripod and retrieval device by manufacturer, model, and serial or asset number where available. Record the applicable setup-manual revision, plus relevant harness, line, connector, or rigging identifiers. If an item lacks a serial number, use its inventory ID or another traceable description. Do not infer compatibility or system capacity from a component label. Record the approved configuration and its source. These identifiers also help procurement compare specified equipment with what is on site and flag gaps before an entry is planned.
Record checks, routing, and responsibilities
Describe the setup geometry in practical terms: tripod position relative to the opening, leg configuration and locks, device mounting point, and retrieval-line path. Note whether the line runs freely and where contact, snagging, or edge hazards were addressed. Record the pre-use inspection and function check according to the equipment manufacturer's instructions. Include any damage, unusual operation, or item removed from service. Record the result and the checker. A specific record is better than writing only "OK."
List roles by name or designation, such as setup verifier, attendant, operator, and rescue contact. Follow the site plan. Capture the communication method and agreed signal or escalation procedure. Link the record to the applicable permit and rescue procedure, including the opening or entry it governs. OSHA's general-industry permit-space rule addresses retrieval planning and equipment use. Its requirements depend on applicability and entry circumstances, so use the site procedure and qualified safety review rather than treating this list as an OSHA form. See 29 CFR 1910.146.
Make changes traceable
Document any deviation, why it was made, who reviewed it, and the corrective action. If equipment is replaced, repositioned, or removed from service, update identifiers and check results so the old configuration is not mistaken for the current one. Close with the date and signoff or approval method required by site procedure. This records what was prepared and reviewed while leaving the employer's program to define approvals and retention.
Discuss a quote or engineering consultation for mission-specific rescue hardware.
Frequently Asked Questions
Where should the retrieval line connect to the entrant?
For general-industry permit-space entry, OSHA specifies a chest or full-body harness. The line attaches at the center of the back near shoulder level, above the entrant's head, or at another point the employer can establish will allow successful removal. Confirm the connection and removal profile for the actual entrant and space before entry. OSHA 29 CFR 1910.146.
Does each entrant need an individual retrieval line?
OSHA's interpretation says each authorized entrant in a permit-required confined space uses a harness with an individual retrieval line or lifeline. A described sequential arrangement on one line may allow individual removal only when it does not impede removal. Plan and verify the arrangement for the entry rather than assuming a shared line is suitable. OSHA's retrieval-line interpretation.
When does OSHA require a mechanical retrieval device?
Under the general-industry permit-space rule, a mechanical device must be available to retrieve personnel from vertical-type permit spaces more than 5 feet deep. The retrieval setup also needs to be appropriate to the rescue plan and space conditions. See 29 CFR 1910.146(k)(3).
Where should the retrieval line's other end be secured?
OSHA requires the line's other end to connect outside the space to a mechanical device or fixed point. Arrange it so rescue can begin when the rescuer recognizes the need. Check that the selected connection and line route support the planned removal path. OSHA 29 CFR 1910.146(k)(3).
Can a tripod and winch also suspend someone for work?
The applicable requirements depend on how the system is used. OSHA distinguishes a tripod and winch used to suspend an employee for work from a system used only to raise or lower a person for retrieval. Evaluate the intended function and applicable rules with the employer's safety professional before relying on one configuration for both purposes. OSHA interpretation on tripod and winch use.
Ready to discuss a mission-specific rescue setup?
A site-specific conversation can help focus the hardware discussion on the opening, retrieval path, and operating plan your team has assessed. Request a quote or engineering consultation about mission-specific rescue hardware.


